Deviations & Deviation statistics
Deviation module
The Boards on Fire deviation module exists to make it easier to register, follow, and measure deviations. By using the module, you can ensure effective management of deviations, which in turn can lead to improved processes, increased quality, and a more structured workday.
Registering deviations is the first step in effective deviation management. With the deviation module, users can easily document deviations directly in the system. Clear and consistent registration is crucial for being able to analyze and rectify deviations effectively.
Deviation management is not a one-time effort, but a continuous process. By continuously registering, following, and analyzing deviations, you can create a culture where continuous improvement is a matter of course.

To register a deviation in Boards on Fire, use our deviation module.
Start by going to the board where you manage deviations. Then click the button ”NEW DEVIATION” to start the deviation reporting.
-
Serial number
Each deviation is automatically assigned a unique serial number when it is created. The serial number is used to easily search for, follow up, and refer to the correct deviation in the system.
-
Begin by choosing the severity level.
Assess whether the deviation is Low, Moderate, Significant, or Severe and choose the option that best reflects the impact of the deviation.
-
Titel
Then enter a short and clear title that simply describes what the deviation concerns.
-
Date of deviation*
Enter the date the deviation occurred. If the exact date is uncertain, choose the date closest to the event.
-
Type of deviation*
Choose the type that best describes what the deviation concerns, for example quality, delivery, safety, or environment.
-
Category
Choose the category that most accurately sorts the deviation, so it is correctly placed for follow-up and statistics.
-
Organization
Choose which part of the business or department the deviation belongs to.
-
Responsible
Enter who is responsible for following up on the deviation.
-
What happened?
Briefly and clearly describe the event or problem so that it can be understood without further explanation.
After that, you can click on “CREATE DEVIATION”.
You then have two options:
- Continue directly and fill in the rest of the deviation report, or
- Save the deviation and complete the remaining information at a later time.
You can also see when the deviation was created and by whom. If the deviation is updated with new information, it is also shown here. Additionally, you see the status of the deviation.
Statuses in the system:
-
Registered: When you create a deviation and click ”Save”.
-
Described: When you have added a description under the heading ”What happened?”.
-
No action: When you select the option ”No action” under the heading ”Investigation”.
-
Planned: When you add one or more tasks under the heading ”Actions”.
-
Investigated: An investigation has been documented under the tab “Investigation”.
-
Completed: When all actions are checked off and marked as ”Completed” under the heading ”Action”.
-
Delegate to another organization: If the deviation affects another part of the business, you can delegate it to the correct organization.The deviation remains on the original board where it was registered, but is simultaneously sent to the new organization for further handling. In this way, traceability is maintained while the correct department takes over responsibility.
-
Comment when delegating: When you delegate a deviation, you can add a comment. Use the comment to clearly explain why the deviation is being delegated and what the new organization is expected to do. This reduces the risk of misunderstanding and makes the handover clear.
-
Images: You can add images to the deviation to clearly show what happened. Images can, for example, be used to document damage, defects, or other observations, making it easier for those responsible to understand and rectify the problem.
-
Custom fields: You can add your own fields to the deviation for information specific to your particular business. Custom fields can, for example, be used for internal references, extra categorization, or special tasks not found in the standard form. This makes it easier to adapt the deviation report to your needs.
-
Risk: In this field, you perform a risk assessment of the deviation. Here you assess how serious the deviation could be for the business, safety, or quality, and state what consequences may arise.
Probability – how likely it is that the deviation happens again.
Consequence – what impact the deviation may have on the business, safety, or quality.
-
Investigation: In the investigation part, you analyze the cause of the deviation.
Five Whys – use the method to ask the question “Why?” five times to find the root cause.
Cause of the deviation – write a clear explanation of why the deviation arose based on the analysis.
This helps to identify the root cause and prevent the same problem from occurring again.
-
Causing organization: Here you state which organization, department, or unit is responsible for the deviation occurring.
-
No action: If the deviation does not require any action, you can mark it as ”No action” under the heading Investigation. This documents that the deviation has been assessed but that no further effort is needed, while it still remains registered for traceability.
-
Reason for no action being taken
When you mark a deviation as No action, you must also state why no action is needed. Examples can be that the deviation does not affect safety, quality, or operations, or that it has already been handled in another way. This creates clarity and documentation for future follow-up.
-
Actions: Under this tab, you state the concrete steps to be taken to rectify the deviation. For each action, you can specify: What is to be done, Who is responsible, When the action should be finished.
-
Improvements
Here you create improvement measures aimed at preventing the same deviation from occurring again. This could be, for example, new routines, process improvements, or training. For more information on how you can work with improvement measures, see our guide HERE!
You can close a deviation in three different ways:
Close without action: If you activate this option, the deviation is closed immediately without any actions being planned.
Close with action (one or more): Here you plan one or more actions linked to the deviation. When the action is carried out, you get the opportunity to mark it as ”Completed”, and then the deviation is also closed.
Close with improvement: Here you create an improvement based on the deviation. When the improvement is carried out and marked as ”Completed”, the deviation is closed automatically.
When a deviation is closed, it is registered on the date it was submitted.
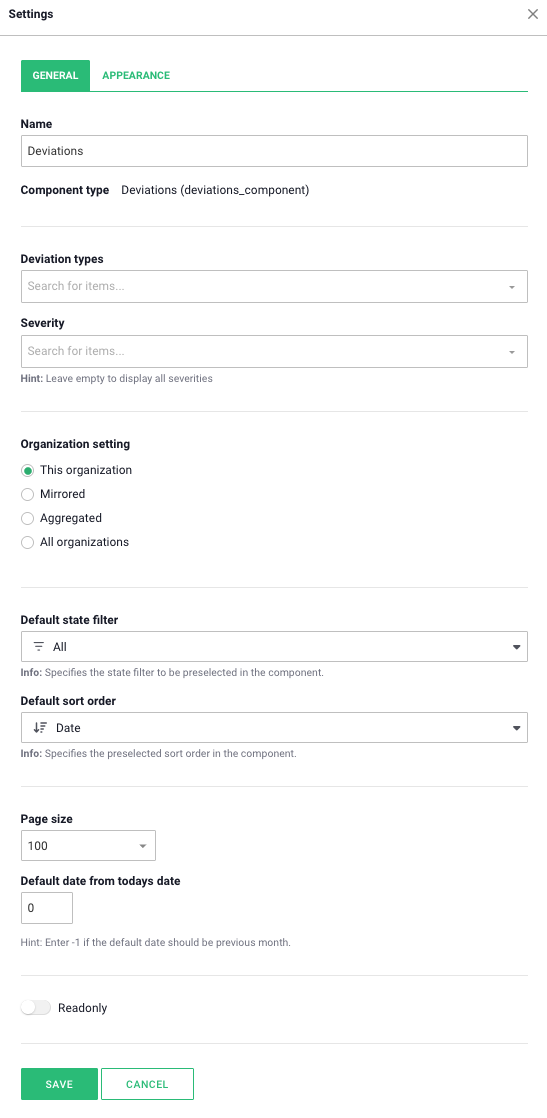
Settings of the deviation component
When you click on “Deviation Component” in the component menu, a box will appear with a button for settings. Click the button to open the settings, as shown in the next image.

-
Name: Choose a name for the component.
-
Type of Deviations: In this dropdown list, select which types of deviations should be displayed in the component. How to edit this list is explained later in the article.
-
Severity: In this dropdown list, choose whether only deviations of a specific severity level should be displayed in the component.
-
Scope: Select which organizations’ deviations should be shown in the component. For example, you can choose to mirror another organization or aggregate from multiple ones.
-
Page Size: Choose how many deviations should be displayed per page in the component’s list.
-
Default Date from Today’s Date: Decide whether the component should display dates before or after today’s date.
-
Read-Only: If this toggle is enabled, it will not be possible to add or edit deviations in the component.
Under the “Appearance” tab, you can make the following selections:
-
Display Mode: Choose how the component should be displayed. Below, you will find images of the different options.
-
Calendar/Cross Maximum Width: Adjust the size of the calendar or cross in the component (if one of these display modes is selected).
-
Hide Deviation List: If this toggle is enabled, the list will not be visible in the component.
-
Hide Component Header: If this toggle is enabled, the component header will remain hidden until you hover over it with the mouse.
-
Show Current Streak: If this toggle is enabled, a number indicating the days since the last deviation will be displayed.

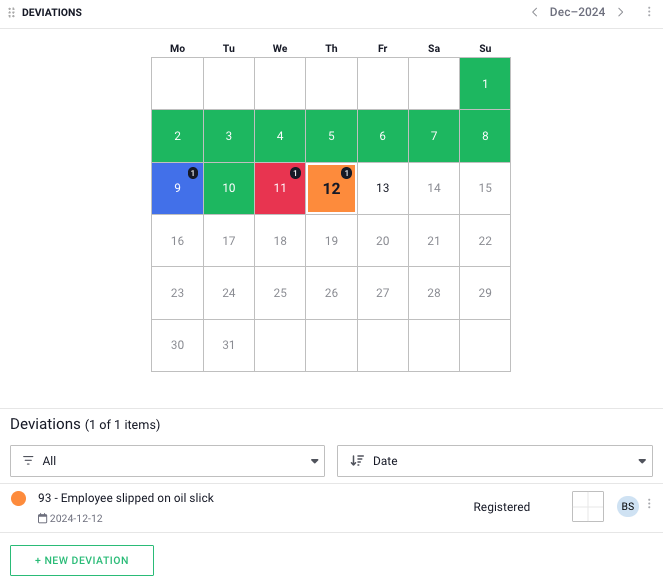
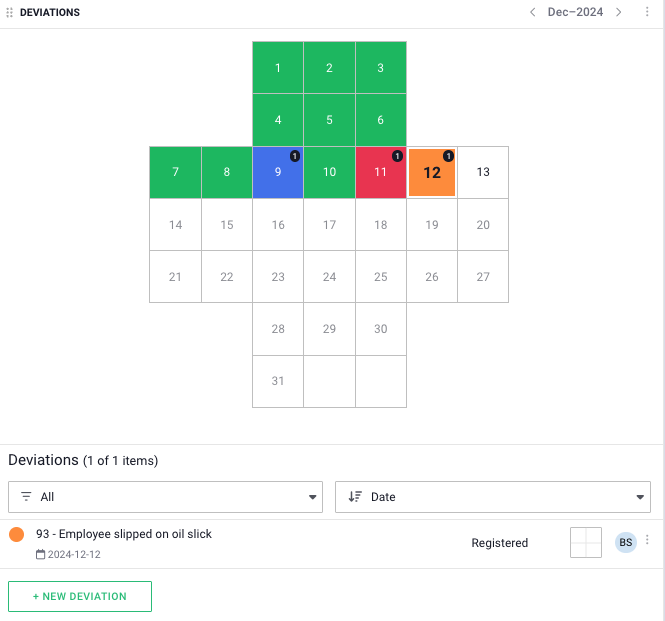
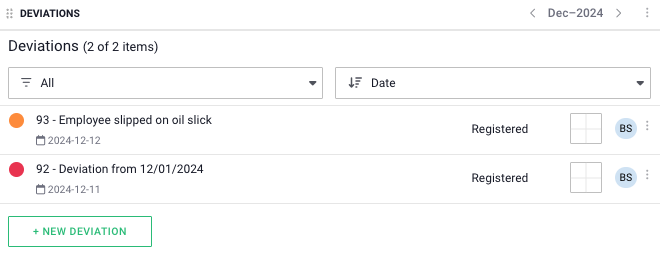
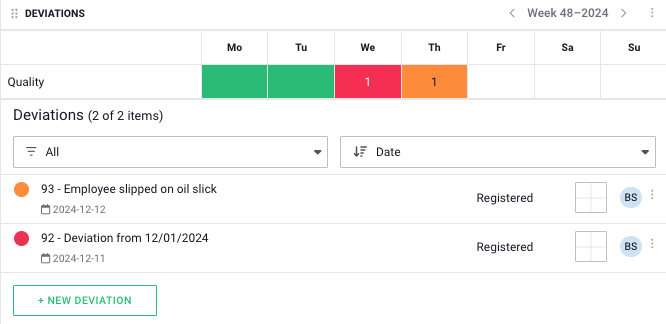
The different display modes:
Calender
Cross
List
By deviation type
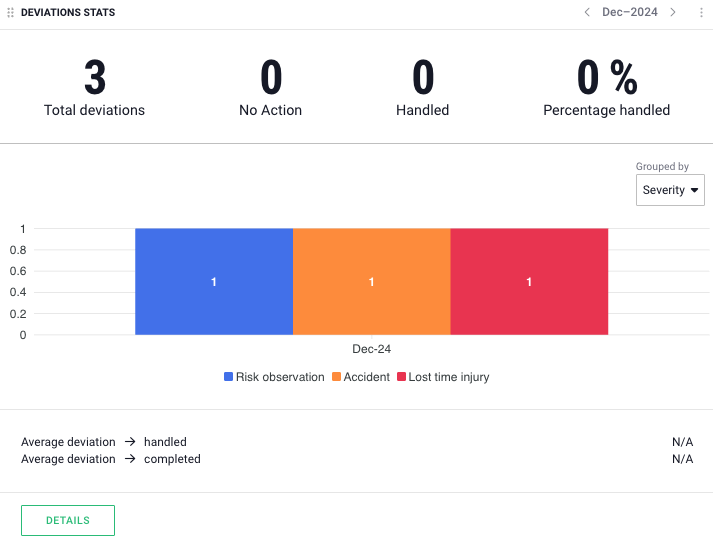
Deviation statistics
Deviation statistics in Boards on Fire is a powerful tool for analyzing and tracking registered deviations over time. With clear and detailed statistics, you can identify patterns, trends, and potential areas for improvement in your processes.
Using deviation statistics, you can easily identify recurring issues, track the progress of corrective actions, and measure their effectiveness. The overview view provides a summary of key metrics, such as the number of registered deviations, the most common types of deviations, severity distribution, and deviations per organization or department. With filtering options, you can further refine your analysis and break down the statistics based on deviation type, severity level, responsible person, or status.
The statistics are not just a tool for understanding what has happened but also a foundation for making better decisions moving forward. By regularly analyzing the data, you can proactively address recurring issues, follow up on the effectiveness of corrective actions, and ensure that resources are allocated effectively.
By integrating deviation statistics in Boards on Fire as a key part of your improvement efforts, you can create a more structured, proactive, and quality-focused organization.
You can add a Deviation Statistics component by clicking the “Add” button in the top-right corner of an overview board and then selecting “Deviation Statistics” from the list.
In your board, it will then appear as shown below. Click on “Settings”.

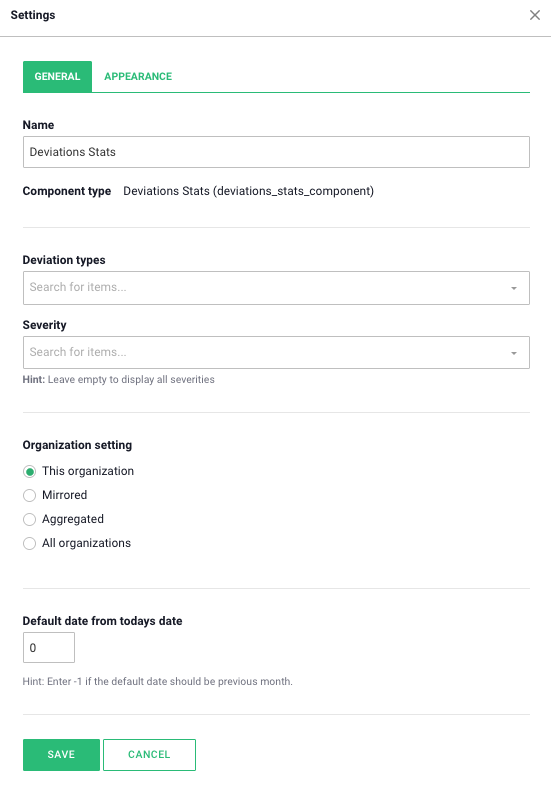
Under the “General” tab in the component settings, you can make the following selections:
-
Name: Choose a name for the component.
-
Type of Deviations: In this dropdown, select which types of deviations should be displayed in the component. Instructions on editing this list are provided later in the article.
-
Severity: In this dropdown, choose whether only deviations of a certain severity level should be displayed.
-
Scope: Select which organizations’ deviations should be shown in the component. For example, you can choose to mirror another organization or aggregate from multiple organizations.
-
Default Date from Today’s Date: Decide whether the component should display dates before or after today’s date.
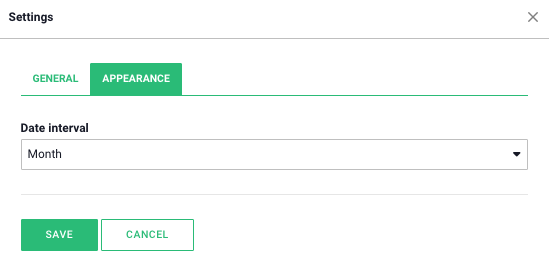
Under the “Appearance” tab, you can adjust the date range in the component.
Once the component is configured, you can also choose how the data should be sorted using the dropdown list in the component.